Building a greenhouse
If you’re a keen gardener, then building a greenhouse in your garden is probably going to be a job that you have to tackle at some stage. Clearly, before you begin, you need to take plenty of time deciding on position. You need to site the greenhouse in full sun, if at all possible – shade can be created, but the sun cannot be redirected! Make access to the greenhouse easy and consider benching and staging possibilities before you build it. A concrete base is often the best option, but if you are building on grass or soft ground, a greenhouse base kit is the perfect option and is shown in the sequence below.
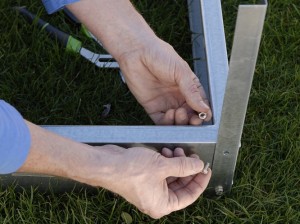 |
1. If you are using a metal base kit, assemble it by closely following the manufacturer’s guidelines. Make sure nuts and bolts are tightened well. |
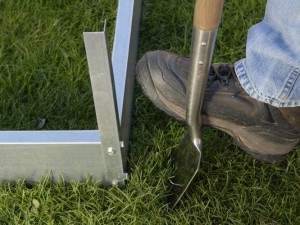 |
2. Dig holes to accommodate the leg sections at each corner as these are sunk into the ground to secure the greenhouse in position. |
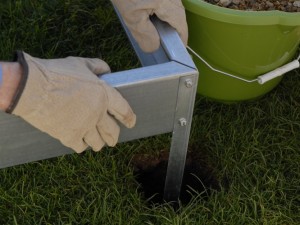 |
3. Turn the base over so that the leg sections drop into the holes. Check that the base is level and ‘square’ at all corners and along all edges. |
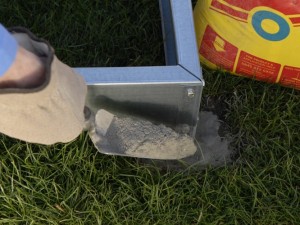 |
4. Compact the base of the hole with a little gravel before pouring in some post mix. Water it in as directed and tamp down with the back of a trowel. |
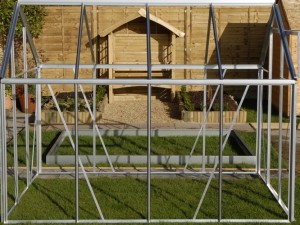 |
5. Assemble the frame near to the base, where you have room to work. It is easier to screw together when you have plenty of space. |
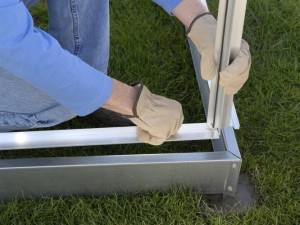 |
6. When complete, place the frame on the level foundation. When everything is in position and square, bolt the greenhouse down. |
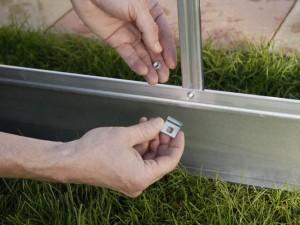 |
7. Most greenhouses are secured to their base with brackets and bolts. Ensure you have the right amount of each before starting. |
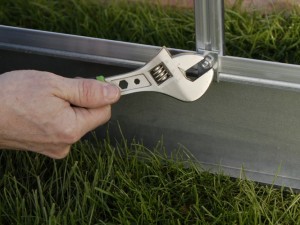 |
8. Make sure the nuts and bolts are securely tightened with an adjustable spanner to ensure the frame is firmly secured to the base. |
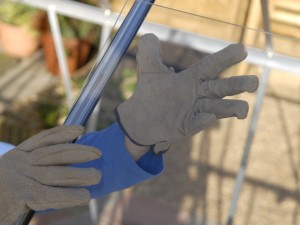 |
9. Starting in the middle and working outward, fit the lower roof glass first so that it will overlap correctly. Wear heavy protective gloves and take extra care. |
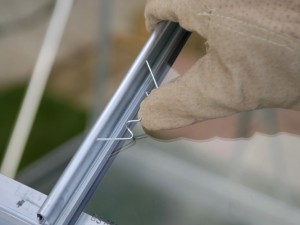 |
10. Fit all glass carefully. following the manufacturer’s guidelines precisely, positioning clips as directed. Continue fitting until complete. |
Greenhouse tips
- This sequence shows the principles, and step 5 could suggest that assembling a greenhouse is a very quick job. In reality, it is straightforward, but there are hundreds of components, and it really isn’t a 5 minute job. Put it this way, it will probably take you the whole weekend to assemble the frame – particularly fiddly bits include inserting the rubber seals to make the glass units waterproof. Also some assembly manuals are in my opinion pretty poorly put together and there is often some trial and error before you find out exactly what the manual is suggesting.
- Most greenhouse kits are aluminium, meaning that it will look good and last for years. If you do think about going the wooden route, remember that it will need painting or treating every few years.
- Greenhouse frames are available in many different heights, with some being much more comfortable to work in if you consider raising them a little on a brick plinth for example.
- Don’t forget water and power. It may cost extra to ensure that these utilities are readily accessible, but it will make it easier to work in the greenhouse with greater success.
- If you’re in the market for buying a greenhouse, bear in mind there are many, many online greenhouse suppliers, and many of these are supplying the same ranges as each other, so be sure to do a thorough price check. You also clearly need to decide on size, quality and type of glass/polycarbonate, and other aspects such as having opening windows or not.
