Fitting a bracket shelf
Simple shelf brackets come in many shapes and sizes. As with most shelving systems, the brackets should have manufacturer’s guidelines relating to how much weight they can support. Most brackets are fixed to the wall using the technique below, where screws are used to secure the brackets to the wall. As always, take great care when fixing into walls so as to avoid cables and pipes that may be buried under the wall surface. A cable, pipe and stud detector will help in finding suitable fixing points for fitting a bracket shelf.
 |
1. Position the first bracket, using a spirit level to make sure that it is precisely vertical. Use a bradawl to mark fixing points. |
 |
2. Drill pilot holes at the marked of positions and insert the appropriate wall plugs. Fix the bracket in place – often the screws will be supplied. |
 |
3. Use the first bracket as a support for positioning the adjacent bracket(s) – simply rest one end of the spirit level on the fixed bracket with the other on the next bracket, and move it up or down the wall until it is in a perfect level position. Fix in place as in steps 1 and 2. Continue adding brackets as required. |
 |
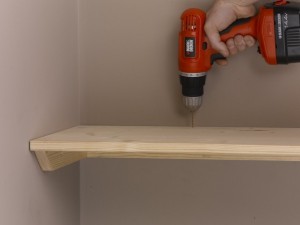
4. Once the brackets are fixed, rest the shelf on top. Further screws may then be added through the brackets into the underside of the shelves. |
Shelving tips
- Should you need any further information on fixing into different wall surfaces, see guides ‘Fixing into masonry walls‘ and ‘Fixing into hollow walls‘.
- Brackets are often sold separately to shelves giving you a greater choice in terms of mixing and matching styles and finishes. Melamine shelves are popular because they are already ‘finished’ or you can opt for wooden shelves that may then be painted to suit your colour scheme.
- You will always need a drill when fixing some shelving to a wall surface. Check out my guide ‘Buying a cordless drill’ for my choice on the best cordless drills to buy for DIY.
