Hanging pictures and mirrors
Yes, theoretically simple, but anyone who has tried hanging pictures and mirrors knows there can be a few problems along the way. First you need to consider what type of wall you are working with – for example a solid (masonry) wall or a hollow (stud) wall.
In general, masonry walls will accept some picture hooks and masonry nails. However, for heavier pictures, a screw fixing is required with the appropriate size of wall plug, to ensure that the weight of the picture will be supported.A power drill or drill/driver will be required to make the necessary holes. For further information on cordless drills, please check out my guide – ‘Buying a cordless drill’.With stud walls, plasterboard is attached to vertical timbers called studs and horizontal timbers called noggings. Locate a timber to screw into and you have a solid fixing for a nail or screw. If you need to fix into the hollow part of the wall, pay close attention to steps 12-14 below.
A cable, pipe and stud detector is useful for helping to locate timber studs and the locations of electricity cables and water pipes that may be concealed below the wall surface. Also, do not drill directly above or below light switches or plug sockets as cables conventionally run vertically up from light switches and down from sockets – however, take care as conventions are often broken.
Please bear in mind that the pencil markings shown on the walls below are for illustration purposes. When you come to do it, make the marks as faint as possible so that they can easily be rubbed off if required!
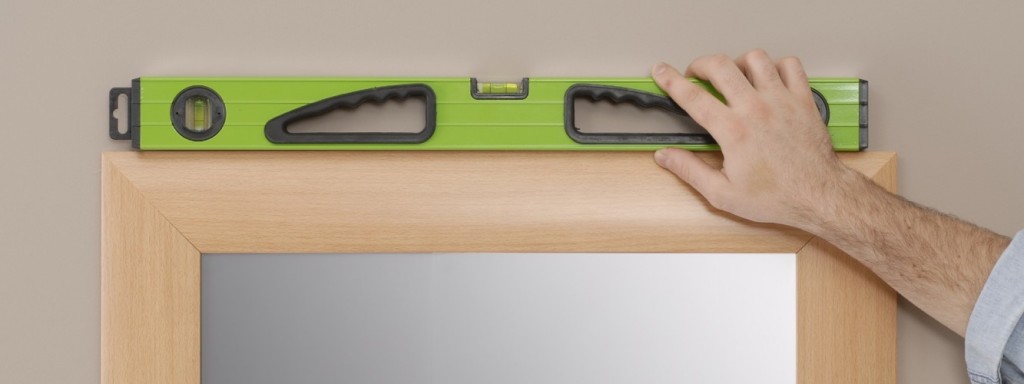 |
| 1. Hold the picture, or mirror, against the wall. With a spirit level, check that it is level. |
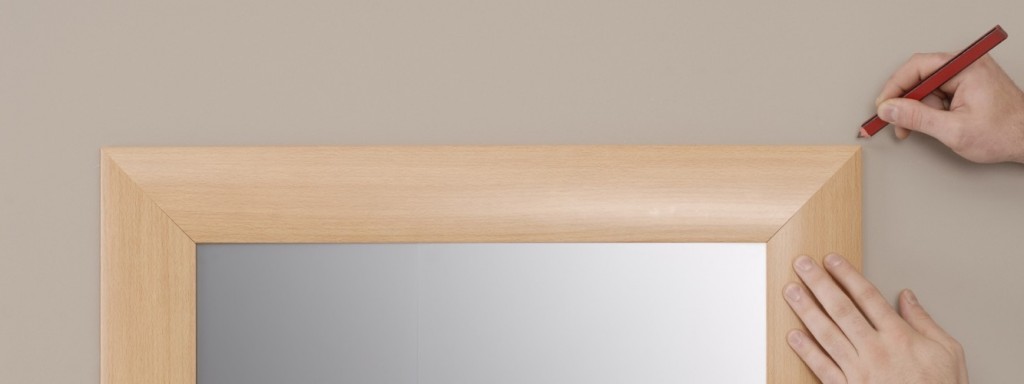 |
| 2. Mark on the wall the top corners of the frame. Get someone to help by supporting the weight of the picture or mirror. |
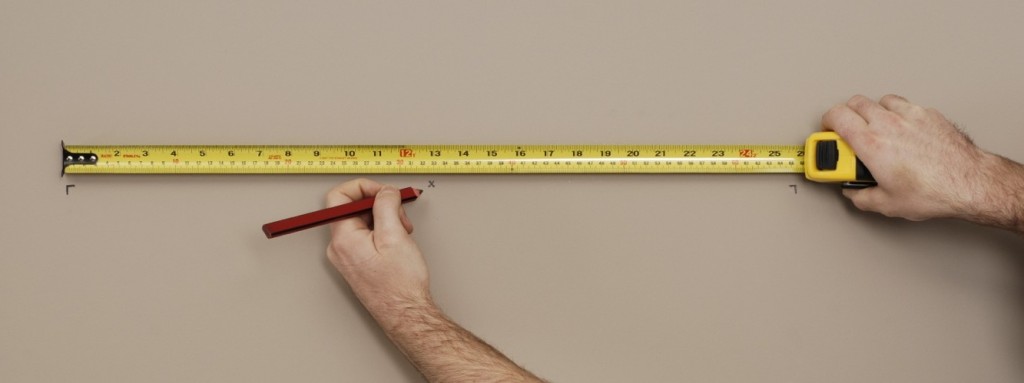 |
| 3. Put the picture/mirror aside and measure a point halfway between these two marks. |
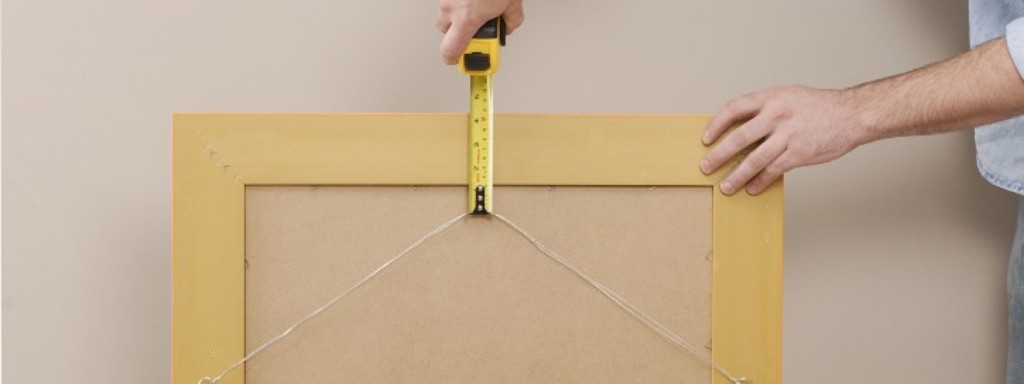 |
| 4. On the reverse of the frame, pull the cord/wire taut in the centre and measure the distance from cord apex to the top of the frame. |
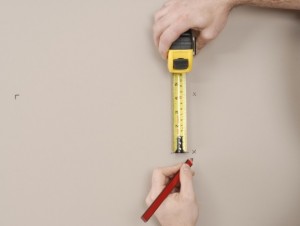 |
5. Transfer this measurement to the wall by measuring down from the central mark. This is where you will position the hook. |
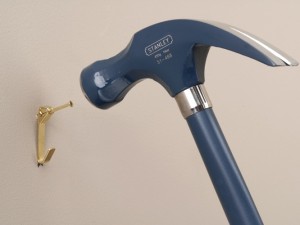 |
6. For lightweight pictures or mirrors, nail a picture hook in place. Ensure that the hook rather than the nail position corresponds to the mark on the wall. |
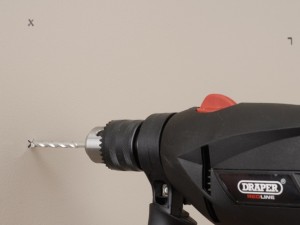 |
7. For heavier pictures on a masonry wall, drill a hole with a masonry bit. A size 7 wall plug is ideal, so drill the hole to the appropriate size (i.e. use a 6mm or 7mm drill bit). |
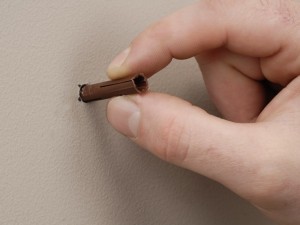 |
8. Push the wall plug into the hole so that it is flush with the wall. You may need to tap it gently with a hammer if it is a particularly tight fit. |
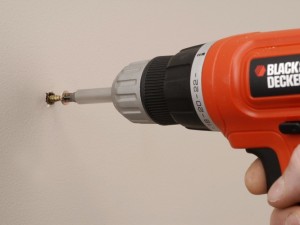 |
9. Screw the fixing in place; in this instance a 50mm screw is used. Ensure that the head is left protruding a few millimetres from the wall surface. |
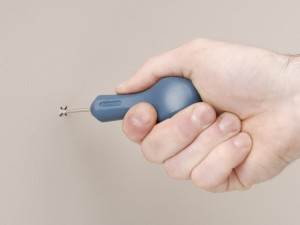 |
10. For a hollow wall, insert a bradawl into the plaster to see if the fixing positions are over a timber stud or the hollow part of the wall. |
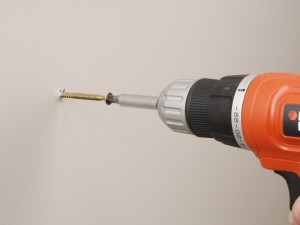 |
11. If the marks are over a timber stud position, insert the screw directly into the wall, and the stud. This will give a secure point to hang the picture or mirror on. |
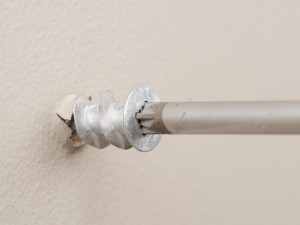 |
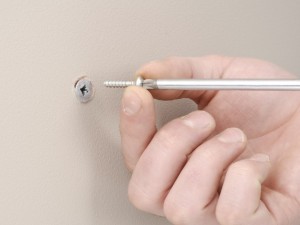
12. If the marks are over the hollow part of the wall, insert a spiral fixing plug by screwing it through the mark, directly into the plasterboard surface. |
 |
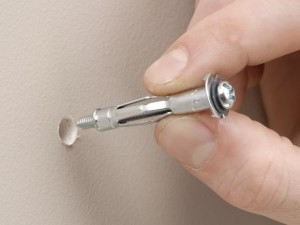
13. Insert a screw into the spiral fixing plug. These are usually supplied with the plug, to ensure a tight fit. Allow the head to protrude slightly. |
 |
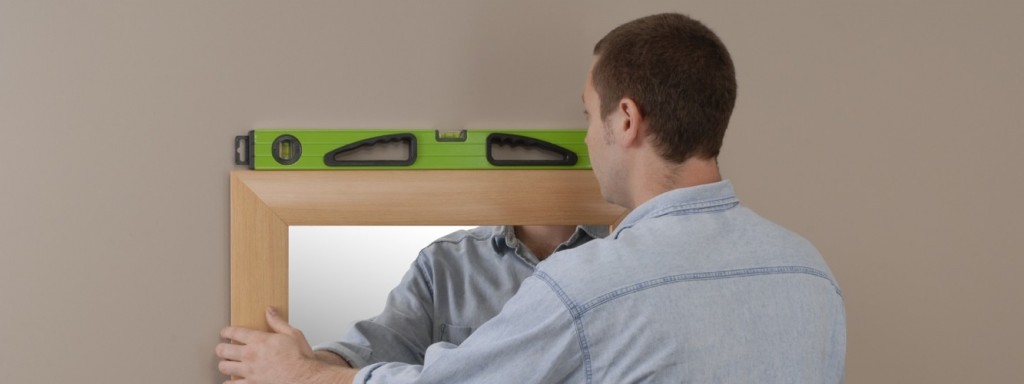
14. To hang heavier pictures on a hollow wall, alternative wall plugs are available, such as a hollow wall anchor (shown here) or a spring toggle. |
 |
| 15. When you have inserted the fixing appropriate to the wall, the picture or mirror may then be hung. Check that it is level and adjust if necessary. |
Picture hanging tips
- Using two people to hang a picture is best as one can hold it in place while the other can stand back and make judgements on height and position.
- Picture wire is better than string for hanging pictures and mirrors, as the wire will not stretch or wear through.
- For more information on fixing into walls, please check out my guides – ‘Fixing into masonry walls’ and ‘Fixing into hollow walls’.
- Further information about wall plugs, screws and fixings can be found in my ‘Household fixings kit’ guide.

Thank you! Any decor can be enhanced with carefully planned picture hanging and unique and stylish picture frames. The frame you use to surround any picture is considered to be just as much a design element as the picture itself. When a frame is chosen correctly, it either draws the picture out further or blends with the background to enable the artwork to speak for itself. This is interesting.