Fitting batten shelving
As an alternative to the many flatpack or adjustable shelving systems on the market, you can of course construct your own shelving system to create a more fitted look. A custom made system like this can follow a number of different designs. One of the most straightforward options being a batten shelving system such as the one shown below. This type of shelf is normally constructed in an alcove. As always, take great care when fixing into walls so as to avoid cables and pipes that may be buried under the wall surface. A cable, pipe and stud detector will help in finding suitable fixing points for your batten shelving.
 |
1. With a spirit level, draw a level guideline for the lower edge of the shelf, on the back and side walls of the alcove. |
 |
2. Measure and cut two 50mm x 25mm (or similar) battens for each end shelf support. Mitre the battens at one end ensuring that they are at least two thirds of what will be the shelf depth. |
 |
3. Hold one batten in place, and drill pilot holes through the batten and into the wall behind. 2-3 holes normally suffice with a support of this length. Repeat with the other end support batten. In this case, the walls are hollow (stud wall) and therefore an hss bit is being used. For a masonry wall, you will need a masonry bit. |
 |
4. Insert the appropriate wall plugs in the holes – here, self-drill/spiral ones are being used in the stud wall, so instead of being pushed in, they are screwed in place with a hand-held screwdriver. For a masonry wall, see below in ‘Things to consider’. |
 |
5. Add some grab adhesive to the back of each length of batten before positioning to add extra strength. |
 |
6. Fix with the appropriate length of screw through the pilot holes. Measure and cut a batten for the back edge of the shelf, pilot hole, apply adhesive and fix in place using the same technique as used for the end battens. |
 |
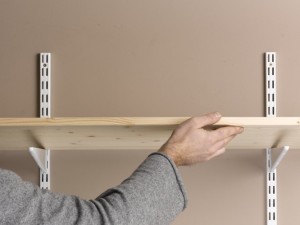
7. Measure and cut your shelf to length and position it on the battens. The front of the shelf can overhang the front of the battens by a third of their length, but no more. |
 |
8. Drill 2-3mm pilot holes every 15-20cm along the back and side edges of the shelf. |
 |
9. Fix through the pilot holes to secure the shelf in position using appropriate screws – long enough to go through the shelf and around 10-20mm into the batten. You may also use a countersink drill bit so that the screw heads will sit below the wood surface. They may then be filled and sanded smooth before decoration. |
 |
10. To finish the shelf you can attach some moulding to the front edge. Cut moulding to length and fix with panel pins every 10cm. Use a nail punch to knock the pin heads below surface level – these can then be filled and sanded before decoration. |
Shelving tips
- For a masonry wall in step 4, you can remain holding the batten in position, tap the appropriate wall plug into the batten/wall surface with a hammer, before inserting the appropriate length of screw – again, first, tapping it in place with a hammer. This will push the wall plug and screw further into the wall surface. Once you feel some resistance, finish screwing the screw in place with a drill/driver. For more information on fixing into walls, see guides -‘Fixing into masonry walls‘ and ‘Fixing into hollow walls‘.
- Always consider the load that the shelves will have to take. The strongest shelving will result from being fitted to masonry walls, or, on hollow walls, if the fixings can be inserted directly into the wooden studs.
- There are many options for mouldings to fix to the front edge of shelving. Choose to suit your taste.
- Putting up any sort of shelving will require the services of a drill. For more information on suitable options for you, see my guide – ‘Buying a cordless drill’.
