Decorating fillers
Decorating fillers occupy row upon row of shelf space in most DIY outlets, which I always imagine provides a very confusing message to most experienced DIY enthusiasts, let alone some poor soul considering their first decorating project. I appreciate that there are different manufacturers, and different package sizes, but that aside, the overwhelming choice seems to encourage buying a different filler for every occasion, when in fact you can do every decorating job you’ll ever come across with a far, far smaller range requirement.
I don’t doubt that most of the products in these vast decorating filler ranges will indeed do the job they claim, but if you want to save some money, my guide below outlines what I feel are the only decorating fillers you really need in your toolkit.
All purpose filler

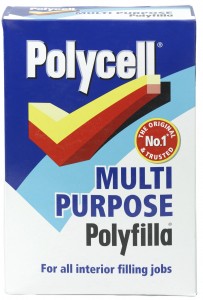
Polyfilla is my first choice for an all-purpose filler. This multipurpose filler (pictured) does all that the all-purpose will do, except it cannot be used outside.
Not surprisingly, as the clue really is in the name, every decorator needs all purpose filler. This comes in powder form, is mixed with water, and you’ll mainly use it for filling cracks and holes in ceiling and wall surfaces. It dries in an hour or two; overnight for deep holes, and then you simply sand it to a smooth finish.
For best results, and for deeper holes, you need a second application as it can shrink slightly, but as you gain experience over time you will find that you can fill most holes slightly proud of the surrounding surface (without smearing excess filler over areas that do not require filling!), and sand them back smooth – therefore requiring just one application.
You can also use it to fill wood, inside and out, and although I use it for small wood indents and knocks inside, and filling areas of cracked putty outside, I tend to go for a two-part filler (see further down this guide) for filling nail and screws holes on interior woodwork, and large holes on exterior woodwork. You can buy all purpose filler ready-mixed, but it’s much more expensive, so in general, always go for the mix your own option. The only exception to this rule is again, explained further down this guide….
Flexible filler or caulk

Flexible filler or caulk is essential for cracks and joints.
Flexible filler or caulk is your second must-have product. Caulk is used along joints to fill gaps that are prone to movement. Typically, we’re looking here at places like the junction between the walls and skirting board, walls and architrave, ceiling/wall junctions and internal corners of your room.
Caulk is supplied in a cartridge, which is inserted into a cartridge gun, where you then squeeze the cartridge gun trigger to apply a bead of caulk along the crack, or junction. It’s also vital for woodwork when filling the cracks around door panels, gaps around door frames, and so basically, the uses are never ending. Most varieties you can also use outside. There is absolutely no other flexible filler you need.
Caulk cannot be sanded, so it is applied, and smoothed, after all your other preparation has taken place.
Slight confusion can occur with caulk as it is supplied in the same type of tubes as silicone sealant. Be aware that these are completely different products, more about which, you can read in my guide – ‘Caulk or silicone sealant?’
Two part epoxy filler
Two part epoxy-based filler is often branded with names like “High Performance Wood Filler”, and should not be confused with tubs of “Wood Filler”, which is fundamentally just “another” ready-mixed filler option. You basically scrape a blob of the ready-mixed filler base out of the tin, then squeeze a small amount of the supplied hardening chemical (catalyst) onto the blob, mix it all together, before using it to fill holes in wood. You have a very short working time, 15-30 minutes, before the filler dries rock hard.
So, why use this instead of the all-purpose filler? Well, epoxy or chemical bond fillers dry to an incredibly hard finish, that will not shrink in the slightest, wear away, or deteriorate over time. It can be drilled into, shaped to mimic different profiles, and is all in all the most hardwearing wood filler in the market.
However the downside is it’s horrible to work with – awful smell, high VOC level, and you really need a power sander, especially if your filling technique is not the best i.e. you leave too much excess on the wood surface. So you must wear a decent protective dust mask when using this product, and have excellent room ventilation. I always use two part fillers on skirting and architraves, as these are the areas of your trim, that take the most knocks. For filling outdoor wood, it is also my filler of choice.
Small pot of ready mixed filler

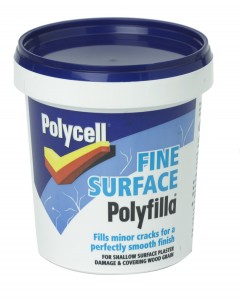
A ready mixed tub or tube of filler is always handy. This fine surface option is ideal, but a quick drying one can sometimes be even handier!
Occasionally we all miss a dent or hole when preparing to decorate, and nothing is more annoying than the scenario when you think everything is sanded perfectly and ready for paint, and then you notice a couple of small holes. Therefore if you have a small tube, or tub of any ready mixed filler knocking around, you can just quickly fill the hole without going through the process of mixing up some of your all-purpose filler, followed by cleaning your tools again etc etc.
You can also save further time by choosing a quick drying option as your ready mixed “back up” filler, meaning you don’t have to wait long for it to dry, and you can crack on with the painting without much of a delay. The other similar scenario where having a tub of ready mixed filler available saves a lot of time, is when you’ve finished work for the day, all your tools are clean and tidy, and as you’re walking out the door, you spot a small hole! Again, it’s then very easy to turn round fill with a bit of ready mixed, which takes no time at all.
Filler exceptions
Therefore the four fillers above are basically my stock items, and they will deal with 99% of all filling requirements when decorating. Save yourself some money, and ignore the rest. The only occasions where other options may be needed are for very large holes in walls, when you’ll need some sort of patching plaster, or when woodwork is to have a natural finish, so you need a coloured or stainable filler to suit the particular finish.
Where to buy filler?
The above photos do look like this DIY guide is bit of an advertisement for Polycell and Polyfilla. Although I have no problem with their products, there are certainly other options. Also, as mentioned in my introduction, you only need to buy two or three of their products, and not the whole range. Most DIY outlets stock Polycell products, but to find their Trade All Purpose Filler, you may need to go to a Dulux Decorating Centre, or a builders’ merchant. Siroflex caulk is one of my favourite brands, but again, it only tends to be stocked by buiders’ merchants but there are plenty of online suppliers. For two part fillers, I almost exclusively use Ronseal, and Amazon provide good prices in this area, but again you’ll find most DIY outlets will be Ronseal stockists.

Julian,
Your guide to fillers was very interesting and useful to a keen DIYer like me who is easily confused by all the products. I’m currently painting my 120 year old panelled front door. The main problem is the cracks between the mouldings and the panel boards, and also some splits in the panel boards. According to your guide, it seems I should use caulk around the mouldings and maybe 2-part epoxy wood filler in the board splits. I have done this before and cracks very quickly show through the paint again, I guess not helped by the door facing south and being painted black causing a lot of movement (but I can’t move the house and I wouldn’t have it any other colour!). Any thoughts much appreciated. I had been thinking about trying Toupret Elafib which people say is extra-flexible, but I’m also wondering whether I should try to fill all the cracks and gaps with wood glue.
Hi Dave,
So sorry for not replying sooner – Don’t know how your comment slipped though the system, and I’ve only just seen it!
Anyway, my thoughts would be that painting a door black – south facing – is always a problem.
If you really can’t face changing to a lighter colour, you could try using Repair Care fillers – give them a Google, and you’ll find some very impressive reviews.
They’re a little bit pricey, but if that door has got to stay black – then Repair Care would be the next option that I’d try.
Sorry again for the late reply – best of luck,
Julian