Fitting kitchen wall units
The most important point about fitting kitchen wall units is to find secure fixing positions. This is not normally a problem with masonry walls, but with hollow or stud walls, ideally all fixings should go into the wooden studs. Alternatively you can take off the plasterboard behind the units and fix wooden noggings (horizontal supports) inside the wall between adjacent vertical studs. This may then be re-covered with plasterboard and patch plastered before fitting the wall units with the fixing brackets provided. For more on this, see my guide ‘Hanging kitchen units on stud walls’.
If you’re fitting a completely new kitchen, fit the wall units after the base units but before the worktop. As always, take care when finding safe fixing points – a cable, pipe and stud detector can help you here.
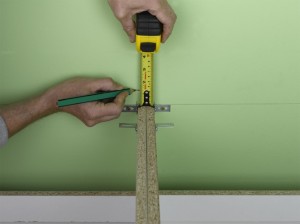 |
1. Measure off worktop height above the base units, before measuring up from here making another mark where the bottom of the wall units will be positioned. Refer to your manufacturer’s instructions for their recommended height above the worktop. |
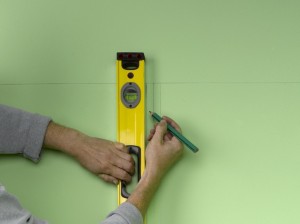 |
2. Draw exact vertical and horizontal guidelines for each unit, again following the manufacturer’s guidelines for dimensions. |
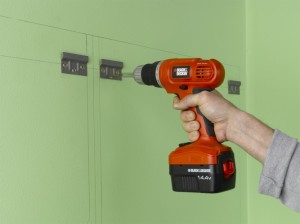 |
3. Fit wall brackets according to the manufacturer’s instructions. Insert the correct wall plugs as required. |
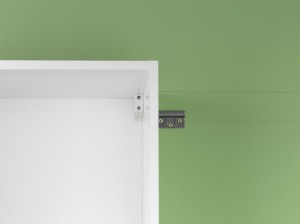 |
4. Hang units on brackets as instructed. It may be necessary to loosen off the adjuster blocks inside the unit to hook them over the brackets. |
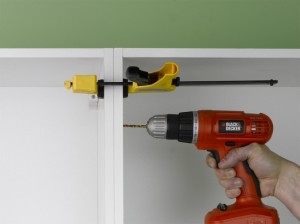 |
5. Clamp units together and drill holes where marked as points to thread through connection screw fixings. |
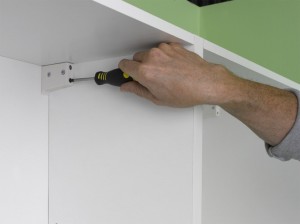 |
6. Make final levelling and tightening adjustments on the adjuster blocks in each unit to ensure each unit is securely fixed in place. |
Further tips on fitting kitchen wall units
- All the big DIY outlets sell kitchens. Wickes, B&Q, and Screwfix, are all worth looking at to see who has a particular offer on at any particular time – all these kitchens can be fitted using the techniques described here.
- If you need to insert noggins into the wall to provide fixing points, it will be a messy job, and therefore do this before you fit any units.
- Make sure you use the right wall plugs in order to get good fixings – For more information about how to fix into walls, see guides – ‘Fixing into masonry walls’ and ‘Fixing into hollow walls’.

Please help!
What width gaps is allowed between the plinth and below the kitchen units? Is half an inch acceptable when cold air comes in?
2 years old house.
Thank you
Hi Wendy,
Basically there will normally be a small gap between the top of the plinth and underside of the unit, which is often dependent on how high the units have been set off the floor, and the height of the plinth supplied – sometimes the supplied plinth will not fill the gap, but any small gap left is usually not visible as it is up under the unit as it were. Alternatively your fitter may have trimmed a bit too much off when fitting.
A half inch gap is probably not ideal, but I can only imagine it is draughty because there is some sort of air brick behind the units, which is important for ventilation in your home.
So, difficult to make any exact recommendations except find out if the gap has been left in relation to any kitchen ventilation requirement. If, it is purely about aesthetics, as long as the gap cannot be seen, then there’s not too much to worry about – ideally a tighter fit would have been better though.
Hope this helps,
Best,
Julian